The BitBox Hardware Wallet
Trying out a new Bitcoin Wallet
I currently have a ledger for both my personal and business stash of bitcoin. But the ledger is built for multiple cryptocurrencies, whereas I really only need a wallet for my bitcoin. So I bought a Bitcoin-Only hardware wallet called BitBox by ShiftCrypto.
BitBix and ShiftCrypto is not a sponsor of this newsletter. I came across BitBox from my own research when looking for a new storage solution for my bitcoin. That being said, if you click one of the links to BitBox in this letter, and then buy a BitBox, I will receive a 12% affiliate commission on your purchase. You’re always free to just go to ShiftCrypto.ch directly without using my affiliate link. The choice is always yours.
Unboxing BitBox
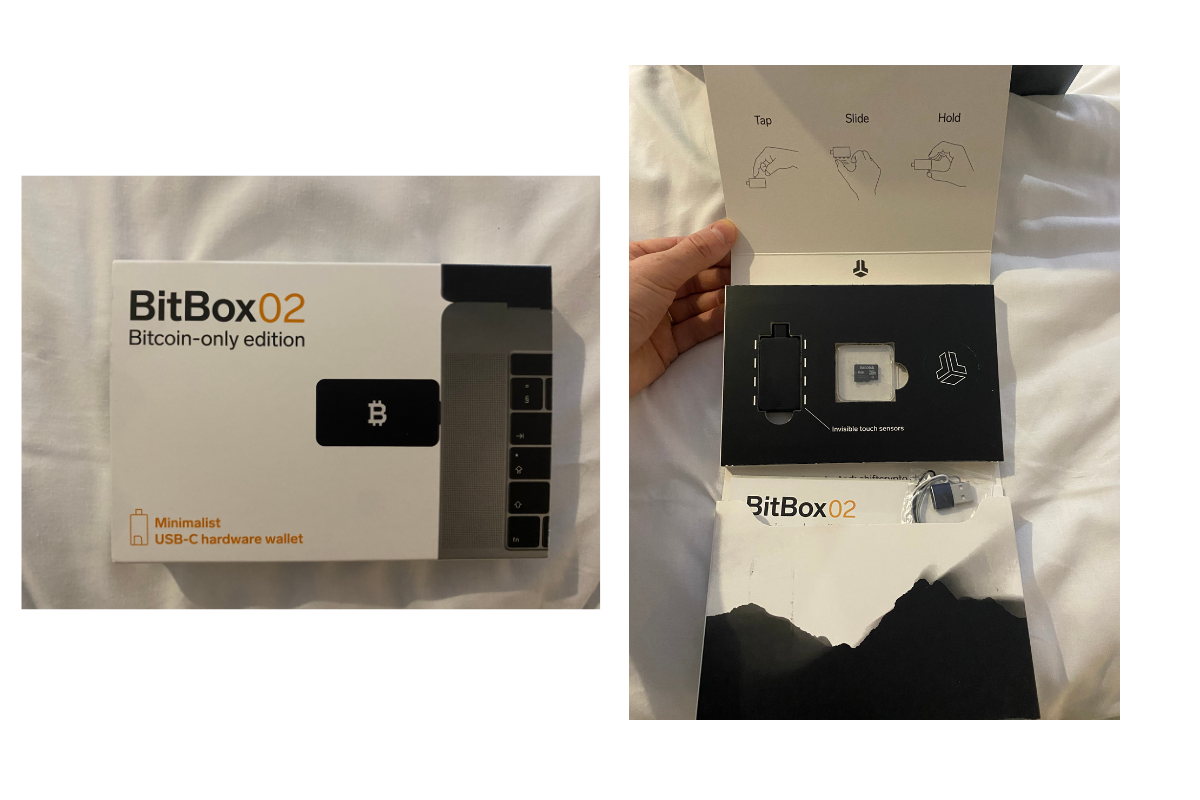
My first impression after unboxing BitBox was a keen sense of detail and direction. Since this isn’t my first hardware wallet, I had an intuition about how to set it up. But I can see how easy it would be for a beginner setting up BitBox.
The BitBox plugs into your computer through USB-C, and comes with a standard USB adapter if you don’t have a USB-C port. After plugging in the BitBox to my machine, I was prompted to install the BitBox Desktop App (Available for Windows, Mac, and Linux).
The BitBox App
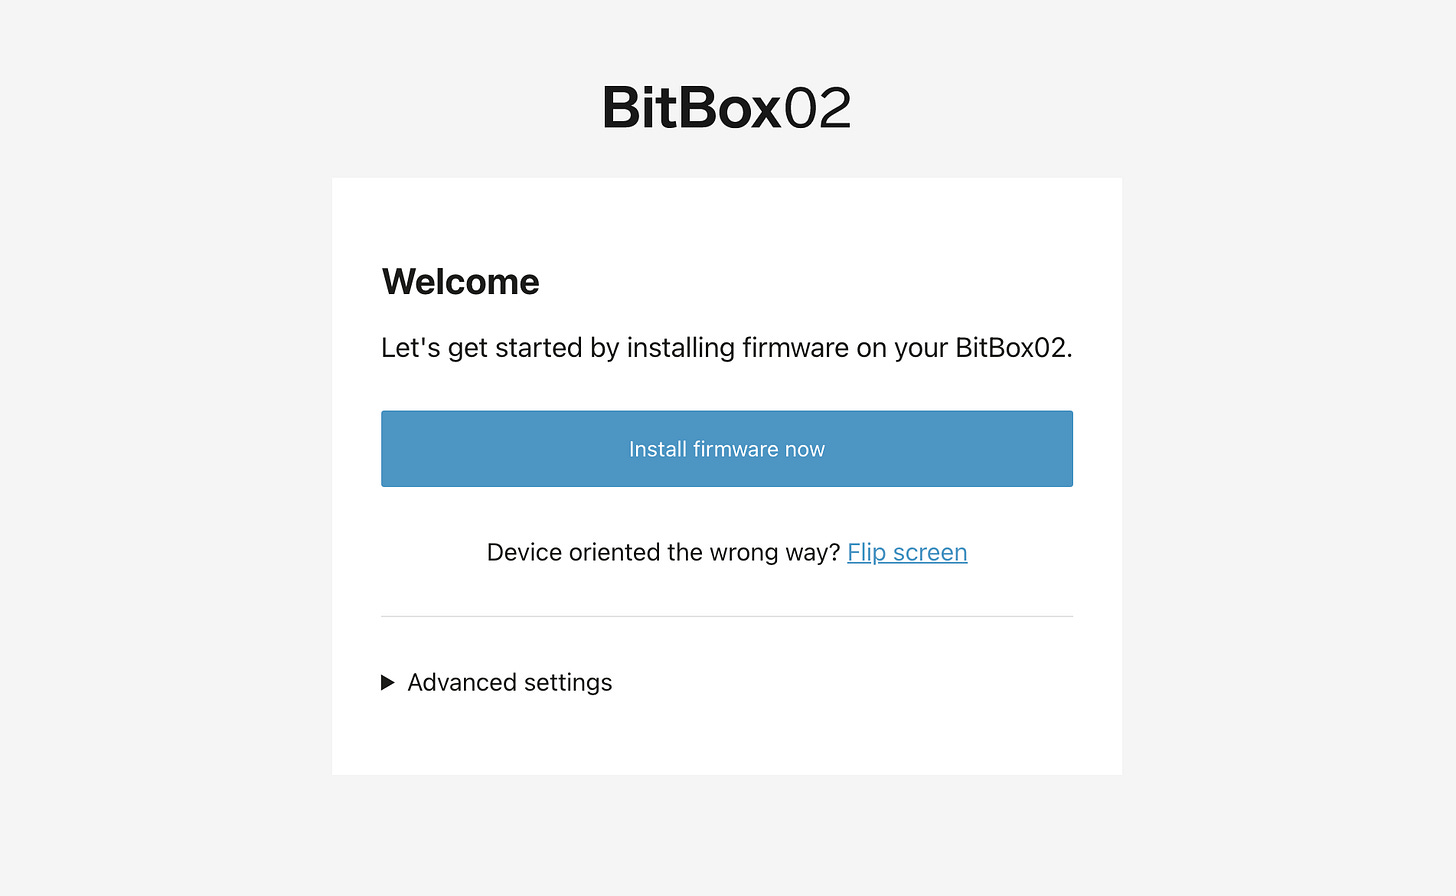
After downloading and installing the BitBox app on my computer, I was prompted to update the firmware of the BitBox itself. The firmware is the “operating system of the hardware”.
Pairing Code
The first screen you’re shown after updating the firmware is a screen showing you the “pairing code”. This is a code that is shown on both the Desktop App and the device itself. If the codes match, then you know that there is a secure connection between the computer and the device.
Create or Restore a Wallet
The next step is to either create a new wallet, or restore your wallet from an existing 12 or 24 backup phrase. I’ve chosen to create a whole new wallet for the sake of demonstrating the functionality of the BitBox.
Creating a Password on the BitBox
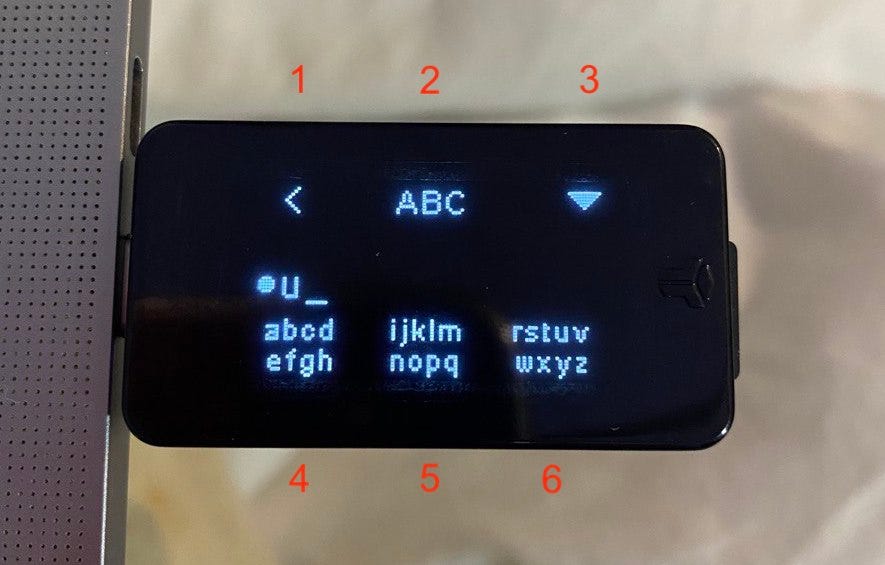
Any hardware wallet I have used in the past has been somewhat difficult to use due to the limitations of interacting with it. The ledger has two buttons on it through which words need to be spelled, and numbers need to be inputted.
Early versions of the Trezor also had two buttons, but the later versions have a touch screen which is a massive improvement.
The Bitbox has 6 “sides” that can be touched in order to navigate through menus, input numbers, and letters. The side of the device itself is touch sensitive.
Backing up your Backup Phrase onto an SD Card
After setting up your password for the device, the Desktop App will prompt you to backup the device onto an SD card. Luckily, the BitBox comes with an SD card. There is a slot on the end of the device wherein you can insert the SD card. The purpose of the SD card is to remove the need to write down 12-24 words. The SD card will store it for you.
This way, you can just worry about keeping the SD card safe rather than a piece of paper which can easily be read or photographed if not stored securely. An SD card offers another layer of security because someone would have to have a device that copies or reads an SD card with them in order to steal your funds.
Depositing Bitcoin onto BitBox
When ready to deposit some funds onto the BitBox, I was shown a blank portfolio with a zero balance of bitcoin.
Using the hamburger menu in the top left hand corner, we can navigate to the Bitcoin page in order to generate an address to receive BTC. I really like the BitBox interface as it gives me the ability to do a couple of things.
1. Verify my Address on the Device Itself
For me, this is an important feature. I like the redundancy of checking that the address on my computer screen matches the address that is being displayed on my hardware wallet.
This redundancy gives me a level of comfort that is not present if I simply had one address on my desktop. The fact that the BitBox and my App are paired, and they’re showing the same address, lets me know that there are no external actors interfering with the addresses.
2. Change the Type of Bitcoin Address to Receive To
This is a bit of a nuance, but not all bitcoin addresses are created equal. There are SegWit addresses, then as BitBox puts it, there are “modern” addresses. I am assuming that the modern addresses make use of the most recent upgrade to Bitcoin called Taproot.
In the interest of using the latest and greatest features that Bitcoin has to offer, I opted to use the “modern” address.
Receiving and Managing Bitcoin
Pretty soon after I sent the transaction from ShakePay, my BitBox interface took notice of the transaction. The transaction was Pending, but I did like to see that the interface at least knew that the transaction existed before it was included in a block.
Other Features
There are more features to the BitBox that I am not going to cover in this letter. For example, you can buy bitcoin and have it sent directly to the device.
You can buy either through direct deposit, or through credit card. Since buying bitcoin with a credit card is blocked everywhere in Canada (as far as I can tell), I won’t be demonstrating that functionality.
There are additional layers of security that you can add to the BitBox. For example, instead of just a password on the device itself, you can add a secret passphrase to the BitBox. This means that even if someone has your backup SD card, they would need to know your passphrase in order to steal your funds. I recommend setting this up, but that’s really just because I like storing as much of my money in my own brain as possible.
Enable Full Node Access. This ensures that the data you’re seeing on your device is validated by your own node. If you are worried about connecting to a random node on the internet, and being fed incorrect information, this setting is for you.
Set a TOR Proxy Address. This gives you an additional layer of privacy when using your BitBox. If you’re on a public network, or you’re worried that someone else might be peering into your internet connection, then this is a good setting for you to turn on.
Ever since I’ve started prompting you to reach out to me directly, I’ve had more discussion and dialogue with some of you. This is the sort of thing that keeps me going. Direct discussion helps me determine what to write about next, as well as how to write better content that suits your needs. As a premium subscriber, I give more weight and critical thought to your messages. Looking forward to hearing from you!
Regards,
Keegan
Resources
Cryptocurrency Memes / Podcasts / Charts - v5HP7yBZAzuGVVJ&


